Categories
A1 A2 Games Materials Past Continuous Past Perfect Past Simple Present Continuous Present Simple Primary Secondary Speaking

Connect 4

This is a no preparation activity you can do to revise virtually any subject for controlled sentence formation practice with young learners, though I suppose if you wanted to, elementary adults might also like this game!

Materials

All you need is a whiteboard and markers in at least 2 different colours. If you havenet got access to a whiteboard, you could easily do it with a piece of paper and pens too.

How to play

Draw a grid on the board. Usually at least 6 squares accross and down, but more can be good for longer games. In this example, I played using the subject of animals and actions, so on the x-axis I selected some animals that had different abilities (flying, walking, swimming, etc.) and on the y-axis I put the actions (jump, run, swim, bite, etc). We were practicing can/can’t, so making sentences such as, “the crocodile can bite” or “the frog can’t fly”.

You could easily put body parts on the y-axis and use sentences with have/haven’t got (e.g. “the dog hasn’t got feathers”) or comparatives… put animals on both axes and write adjectives in the squares so they have to make a comparison between the animals using the adjective given (e.g. “the elephant is bigger than the snake”) or have them practise positive/negative/question forms… the possibilities are endless.

Students must make a sentence using the items on the axes that intersect on the square they want to win. If they give a correct sentence, they win the square.

Simple! You can play this game with groups from 2 upwards.

Why I use it

It works really well because it is fun, and the students practise controlled sentences with repetition to build confidence and better pronunciation too.

The best way to understand how this game works is to watch it in action on my Tiktok or instagram accounts, where I have posted a video of the activity in my own classroom.

Here is a link to the Tiktok video.

Categories
A1 A2 Adult B1 B2 C1 C2 Games Materials Past Continuous Past Perfect Past Simple Present Continuous Present Simple Primary Secondary Speaking

Tenses Rummy

I created this game to do controlled practice of verb tenses in positive, negative and interrogative forms.

Setting up

Print the cards, laminate and cut them out. That’s it!

I have used this with groups of up to 8 players, however if you have bigger groups you may want to print off 2 copies.

You can use these cards in a variety of ways. You can play a rummy type game, where the winner has 3 of one type and 4 of another. I prefer to play with ‘happy families’ rules, as they are simple to understand, so that is what I will explain here.

Playing the game

  1. The cards contain different verbs and pronouns. I have deliberately chosen the most common and irregular verbs. There are 6 cards for each verb. The objective of the game is to collect a set of 3 card of the same verb to gain a point. The aim of the game is to get as many ‘points’ as possible. The pronouns used on the cards are I, you, he, she, we, and they. It is possible to get 2 sets of 3 from each verb.
  2. Students use the pronouns to form the question, so in the ‘Happy Families’ version of the game they don’t have any other use. The important element for the cards is the verb.
  3. Shuffle the cards and deal each student 7. The rest are put in a pile, picture side down, in the centre of the table.
  4. Students choose any other student to ask for a ‘verb’. They may only ask for a verb that they have in their hand. They do so as follows:
    • In this example, the verb card they are looking for is ‘visit’ europe and the tense we are praticing is Present Simple, however you can decide to use any tense for the game.
    • The student will ask using the pronoun they have on their own card, so if they have the card HE – VISIT EUROPE in their hand, the question would be : “Does he visit europe?
    • The other student would need to respond in either the positive, or negative, depending on whether they have any visit europe cards in their hand. “Yes, he visits europe” or “No, he doesn’t visit europe“.
    • With Present simple, you will practise the change in 3rd person Do/Does for questions and Don’t/Doesn’t for negative, plus the 3rd person ‘s’ for positive statements. If you play using Past Simple you will practise the past simple irregular verbs in the positive and use of did + infinitive for negative and questions… etc. Choose your verb tense at the beginning for what your students need to practise.
  5. If the other student has the verb card, they must give it. If they have 2, they must give both of them.
  6. If a student successfully asks and receives a card/cards, they can take another turn. If not, they take a card from the centre pile and play passes to the next left.
  7. Once a set is on the table, it cannot be stolen.
  8. The student with the most sets at the end of the game is the winner.

The game usually lasts a full hour depending on the size of group. The more players, the better the game is. It’s good, as students have to listen to each other to work out who has got which cards.

You can use this game for any verb tense for controlled practice, as repeating the correct sentences in positive, negative and interrogative forms reinforces their understanding. It can fit in with any curriculum and planning.

If you are still unsure how the game works, I have posted a video of actual game play in my classes on TikTok and Instagram, so don’t forget to follow me for updates.

I hope you enjoy it!

Here’s the download link for the PDF :

https://classroomgames.net/product/tenses-rummy/


Categories
A1 A2 Games Infant Materials Present Simple Primary Speaking Vocabulary

Christmas Bingo Game

This is another in a series of simple bingo games to learn and practise vocabulary. This time on the subject of Christmas, to fit in with your festive planning. I usually have a range of activities to do for each subject. Such as a song, game, worksheet, craft, etc..

Setting up

There are bingo boards for up to 6 students, so if you have bigger groups, you will need to print more copies and put them in groups of 6 players. Print off the pdf file linked at the bottom and laminate them.

You will also need to print off and cut out the bingo cards. There are the other 2 pages of the pdf and you will need to print them off back to back. The pages should line up on any printer. Laminate and cut all the squares out.

How to play

  1. Give each student a bingo board.
  2. Place the cards, picture side down, on the table in the middle and spread them out evenly over the table.
  3. Students take it in turns to choose a card from the centre. If they have it on their board, they can place it on top. If not, they must return it to the table. I get students to say the name of the vocabulary item on the card without showing it to the other students. That way, the other students have to listen and remember where the card is, if they have it on their board.
  4. The student needs to complete their board with all their vocabulary to win.

The game usually lasts 15-25 minutes depending on the size of group and their luck! It’s a good way to practice vocabulary associated with Christmas to fit in with your curriculum and planning.

I hope you enjoy it!

Here’s the download link for the PDF :  https://classroomgames.net/materials/christmas-bingo.pdf


Categories
A1 A2 Games Infant Materials Present Simple Primary Vocabulary

Funny Face Bingo Game

I developed this game to learn and practise vocabulary related to the face. I usually have a range of activities to do for each subject. Such as a song, game, worksheet, craft, etc. so this game was develloped to fit in with my planning.

Setting up

There are face boards with diverse options, for different genders and skin colours. Print off the pdf file linked at the bottom and print out as many of the face boards as you need and laminate them. You need one per student.

You will also need to print off and cut out face part cards. There are the other 2 pages of the pdf and you will need to print them off back to back. The pages should line up on any printer. Laminate and cut all the squares out. Try not to leave any white around the face part squares. You can trim the white off.

You can use either a number dice (1-6) to practise numbers or a colour dice if you prefer to practise colours. You can pick these up online quite cheaply, or make your own spinner. The colours needed are red, blue, green, yellow, purple and orange.

How to play

  1. Give each student a face board.
  2. Place the face part cards, number side up, on the table in the middle and spread them out evenly over the table.
  3. Students take it in turns to throw the dice and depending which type of dice you are using, choose a card which has either the same number, or colour as the dice show.
  4. The student needs to complete their face. There are face parts for each individual face. You can either allow students to complete a mixed up face with a variety of parts, or if you want to make the game more difficult or last longer, you can ask them to complete a correct face. If they don’t pick up a piece they need, you can allow them to swap it for one they have already. I always give little ones this choice, as makes them feel like they have done something, rather than lose a turn.

As their face fills up, it will get harder to find the parts they need to complete it, so it can last anything from 20-35 minutes depending on the size of group and their luck! Therefore, it’s a good way to practice colours and numbers along with face vocabulary to fit in with your curriculum and planning.

I hope you enjoy it!

Here’s the download link for the PDF :  https://classroomgames.net/materials/funny-face-bingo.pdf


Categories
A1 Games Infant Materials Present Simple Speaking

Autumn Tree Infant Bingo Game

This game was developed to play while teaching about Autumn. I usually have a range of activities to do for each subject. Such as a song, game, worksheet, craft, etc. I didn’t have a game to play, so I made this one.

Setting up

There are tree boards and leaf tokens. Print off the pdf file linked at the bottom and print out as many of the tree boards as you need and laminate them. There are 2 to a page. You need one per student. I have maximum 8 students in a class, so I can play as a whole group, or in two teams of 4.

You will also need to print off and cut out the leaves. There are the other 2 pages of the pdf and you will need to print them off back to back. So the leaves on one side of the paper and the number squares on the back. The pages should line up on any printer. Laminate and cut all the squares out.

You can use either a number dice (1-6) to practise numbers or a colour dice if you prefer to practise colours. You can pick these up online quite cheaply, or make your own spinner. The colours needed are red, blue, green, yellow, purple and orange.

How to play

  1. Give each student a tree board.
  2. Place the leaf cards, number side up, on the table in the middle and spread them out evenly over the table.
  3. Students take it in turns to throw the dice and depending which type of dice you are using, choose a card which has either the same number, or colour as the dice show.
  4. The student needs to complete their tree with one leaf of each colour. There are red, yellow, orange, brown and green leaves. If their tree doesn’t have the leaf they pick up, they put it on their tree. If it does, they can either swap it or return it. I always give little ones this choice, as makes them feel like they have done something, rather than lose a turn.

As their trees fill up, it will get harder to find the leaves they need to complet it, so it can last anything from 15-30 minutes depending on the size of group and their luck! Therefore, it’s a good way to practice colours and numbers with an autumn theme to fit in with your curriculum and planning.

I hope you enjoy it!

Here’s the download link for the PDF :  https://classroomgames.net/materials/autumn-tree-infant-bingo.pdf


Categories
A1 A2 Games Infant Primary Review Speaking Vocabulary

Sum Swamp

Sum Swamp is an exciting and educational game designed by Learning Resources to help children learn basic addition and subtraction. This game can be used in the EFL (English as a Foreign Language) classroom to engage students and help them improve their language skills relating to numbers and maths vocabulary.

Game objective

The game is played with two to four players and requires players to navigate their way through a swamp filled by throwing 3 dice; 2 with numbers and one with ‘+’ and ‘-‘ signs on them. The first player to reach the other side of the swam wins.

How to play

To play Sum Swamp, each player starts on one side of the swamp and takes turns rolling a dice. The player then either adds or subtracts the dice together and moves their game piece the number of spaces in the resolution. If the player lands on a number square, they rethrow the +/- dice and either move forward, or backward that number of spaces. There are also ‘odds’ and ‘evens’ squares, which require them to throw a number dice again and they can move if they get a corresponding number.

The game is suitable for children aged 5 and up, making it an excellent choice for younger students learning English as a second language as it provides them with a fun and interactive way to learn.

Sum Swamp is a fantastic game that can be used as a fun and interactive way to reinforce vocabulary related to maths and numbers with younger students and if you would like to buy a copy, please use my affiliate link below if you can, as it helps fund this website.

Buy Sum Swamp on Amazon : https://amzn.to/3Dxgh9k

Categories
A1 A2 Adult B1 B2 C1 C2 Games Past Continuous Past Perfect Past Simple Primary Review Secondary Speaking

Rory’s Story Cubes

As an English language teacher, it can sometimes be difficult to come up with engaging activities that will encourage your students to practice speaking. This is where story cubes come in! They are a fantastic tool for practicing speaking skills in the English as a Foreign Language (EFL) classroom. In this blog post, we’ll explore what story cubes are, how to use them in your classroom, and why they are such a great resource for students.

What are Story Cubes?

Story cubes are small, cube-shaped dice with different images printed on each side. They come in a set of nine cubes, with a total of 54 unique images. The images on the cubes range from simple objects like a tree or a sun, to more abstract symbols like a lightbulb or a heart.

How to use Story Cubes in the EFL Classroom

Story cubes are incredibly versatile and can be used in a variety of ways in the EFL classroom. Here are a few ideas to get you started:

Speaking Practice:

One of the best ways to use story cubes is for speaking practice. Have your students roll the cubes and use the images they see to create a story. They can work in pairs or small groups to create a story together, taking turns to add new elements to the story. This is a great way to encourage your students to use English in a creative and relaxed environment.

Vocabulary Practice:

Another way to use story cubes is for vocabulary practice. Give your students a specific vocabulary set, such as action verbs or adjectives, and have them use the cubes to create sentences that incorporate these words. This is a fun way to reinforce vocabulary and help students to use new words in context.

Grammar Practice:

You can also use story cubes to practice grammar structures. For example, you could ask your students to create sentences using the present simple or present continuous tense, depending on the images they see on the cubes. This is a great way to practice grammar in a fun and engaging way.

Why are Story Cubes a Great Resource for EFL Students?

There are many reasons why story cubes are a great resource for students. Here are a few:

They Encourage Creativity:

Story cubes encourage students to be creative and to use their imagination. This is a great way to encourage students to think outside the box and to use English in a fun and engaging way.

They Foster Collaboration:

When students work together to create a story using the cubes, they have to collaborate and communicate with each other. This is a great way to build teamwork skills and to help students to work together effectively.

They Are Easy to Use:

Story cubes are incredibly easy to use. They require no preparation or advanced technology, making them a great resource for both teachers and students.

They Are Portable:

Because story cubes are small and lightweight, they are incredibly portable. You can take them with you wherever you go, making them a great resource for EFL teachers on the go.

Story cubes are a fantastic tool for practicing speaking skills in the classroom. They are versatile, easy to use, and encourage creativity and collaboration. Whether you use them for speaking practice, vocabulary practice, or grammar practice, story cubes are a great resource for students and teachers alike. So why not give them a try in your next class and see how they can enhance your students’ speaking skills!

Rory’s Story Cubes on Amazon (affiliate link) : https://amzn.to/3HmsfUb


Categories
A1 A2 Adult B1 B2 C1 C2 Games Past Simple Present Simple Primary Review Secondary Speaking

One Night Werewolf

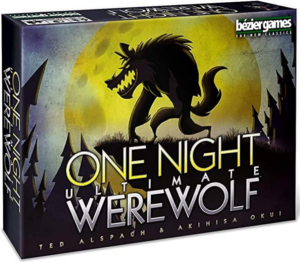
This is a review of a game which I use in class and I find particularly good for students to encourage speaking. It’s a type of game called a ‘hidden role’ game called One Night Werewolf. At the end of this post are 2 free themed downloadable adaptations of this game that I have made too.

It is by Bezier Games and you can buy a copy of it from here : https://amzn.to/3DqGjuC (this is an affiliate link that will support this site if you use it) or alternatively, if all your students have mobiles, you can play it online for free here : https://netgames.io/games/onu-werewolf/

How to play

The object of the game is to find out who is the Werewolf. There are two phases in the game, the night phase and the day phase. The night phase is first, followed by the day phase.

All students take a character card and there are 3 cards in the middle of the table. Each character has a different action during the night phase of the game and they do it in a set order as follows:

  • Werewolf – First checks if there are other werewolves. If there are not, they may look at 1 card from the centre.
  • Seer – Can look at one other player’s card, or 2 of the centre cards.
  • Robber – Changes their own card with another player’s card, then looks at their new card.
  • Troublemaker – swaps the cards of two other players. Doesn’t look at anything.
  • Drunk – Swaps their own card with one from the centre, but cannot look at the new card.
  • Insomniac – After all other actions have been done, they are allowed to look at their own card again to see if it has been changed.
  • Villager – Has no action.

There are other characters, but these are the main ones. Once you have played the game a few times, you might want to start adding more, but to start with, these are complcated enough!

Night phase

At the beginning of the night phase, all students close their eyes. There is a recording that plays on the accompanying app that you can play on a mobile phone, which tells each character when they should open their eyes, what they should do, and when to close their eyes again. It’s important that nobody cheats!

If you are using the mobile app, it does everything for you on the screen.

Day phase

Once the night phase is over, the day phase is a timed period – usually about 3 minutes, but you can set it as short or long as you like – where students can discuss who they are and what they did during the night.

At the end of the designated time period all players vote on who is the werewolf.

During the discussion, students might say thigs like… “I am the robber and I changed my card with…. and my new card was…” or “I was the Seer and I looked at 2 cards from the middle. They were the Robber and Villager.”

The werewolf must try not to be discovered, and the other players must try to discover who is the werewolf. The werewolf must therefore listen to other players and try and make up a plausible lie, whereas all the other players must listen to try and figure out who is lying.

It’s important that noone looks at their cards at all until after the discussion has finished and voting has been done.

It’s a great game for students from about 10 years old upwards. I’ve used it with 8 year-olds with some success, but it’s not usual for children of this age to have developed the mental skills to understand these types of games.

Free adaptations

I have made 2 adaptations of this game called ‘One Christmas Night’ and ‘One Dinosaur Night’ which are obviously Christmas and Dinosaur themed. You can download the PDFs and the accompanying audio recordings for both of these games on the links below.

If you want to see a video explaining the game, please check out my TikTok account… and maybe support me by commenting, liking or following me on social media (I post on Instagram a little less regularly too). I post videos about all the new materials as and when I upload them.

Enjoy! 🙂


Downloadable files

Categories
A1 A2 Games Materials Primary

Naughty Elves Christmas Board Game

This is a Christmas Board game I designed for use in class. I used it the first time this year and it worked really well.

The Story

Christmas is coming and all the Elves are working very hard at the North Pole making all the presents for Santa.


Santa gives a prize every year to the Elf that makes the most toys, but unfortunately there are some Naughty Elves in the workshop that steal each other’s toys to cause mischief. You are one of these Elves! Try and make as many toys as possible for Santa…

Setting up

  1. Print off the main game board in A3 (or the two A4 one and stick together) and laminate.
  2. Print off a few pages of the toy tokens in A4, double-sided. Laminate and cut them out. I usually have 1 page for each student playing, so if my maximum group size is 4, I’ll print 4 pages.
  3. You need 2 x 6-sided dice, or you can make your own special dice by buying blank ones here : https://amzn.to/3VxNKXC and drawing numbers 1 to 5, then an elf hat on the 6th side.
  4. You will need some game pieces for the players to move around the board. You can either print off the Elf ones that I have made here, laminate and cut them out and then use card stands such as these : https://amzn.to/3VtNc59 to hold the pieces. Alternatively you can buy generic board pieces here : https://amzn.to/3gLdSiZ or you can use things like ‘stickies’ from Lidl if you have any spare.

I make a lot of games, so I tend to make my own game pieces, dice, spinners, etc. I have linked to some of the items I usually buy. The links are affiliate ones. I’d appreciate it if you used them. It costs you nothing, but I’ll get a small commission.

Laminator A3: https://amzn.to/3VdgCoe – A4: https://amzn.to/3XzvX49

Rules

The object of the game is to collect as many presents as possible before Christmas Eve to give to Santa to deliver for Christmas to all the boys and girls. The winning Elf has the most TOYS not toy cards… so a card with 3 toys on it is worth more than a card with 1 toy on it.

  • Before starting, give every player 2 random toy cards. The rest of the toy cards are put in a face-down pile at the side of the board.
  • Give each player a moving piece. Everyone starts on the big centre star in the Elf village.
  • Players take turns to throw the dice. They can choose to add the numbers on the dice together, subtract them, or use only one of the numbers. The aim is to land on one of the stars because when they do, they can take a toy card from the pile and increase the number of toys they have.

For example: If you throw a 4 and a 3, you can move 4+3= 7, 4-3= 1, 4, or 3 So you need to work out which combination will get you onto a star.

  • If a player throws a 6 (or if you’re making your own dice, an Elf hat) they can STEAL one toy card from another player. Likewise, if they throw a double 6 (or 2 Elf hats) they can steal 2 toy cards from the same player, or one card from 2 different players. NOTE: If children gang up on one person, you could add a rule that says they have to take from 2 different people, or they can’t steal from the same person on consecutive turns.
  • When they steal, they must ask properly “Please can I have your (3 scooters)” Thus, they are practicing the polite form “please can I have” plus the vocabulary for toys.

You can either play until the class ends, play until the cards run out, or play only for one or more (decided at the start of the game) complete circuits of the board, in which case you can make it more interesting by telling the students that once they get back to the big centre star they are ‘protected’. This means that no one can steal their cards, but they can still throw the dice on their turn and steal other players toy cards if they throw a 6 (Elf hat). In this case, keep playing until everyone gets back to the centre star.

Download it here:

https://classroomgames.net/product/naughty-elves-christmas-board-game/

Categories
A2 Escape Games Games Materials Present Simple Primary Secondary

Spy Escape Game

I love using Escape Games in my classes. Usually they are fine with children from 9-10 years old. Before this age, they can be difficult, as the students often don’t have the skills required to reason. This develops as they get older.

I have written this game using an app I use in class called Escape Team, however you can use it independently of the app by using locks, or just get the students to come to you with each code as they solve it.

If you want to download the app, you can do so for free and use this game for free too with it. It’s good because the app come with it’s own timer, and it will give clues if the students get stuck. All the download links for the app on iOS and Android are below, along with the PDF for the game.

You need to print a PDF for each group playing, and if you are using electronic devices you will need one per team. I have a load of old phones I use in class for stuff like Kahoots and Escape Games. It makes it more fun.

This game is set to take an hour, but please let me know in the comments if your students found it easy or hard and if they took less or more time, so I can adjust it.

The language point is time and routines, as I wrote it for my 6th and 7th year classes that were doing time, present simple and routines at school at the time.

Here’s all the download links: